Your stainless steel sink looks clean. It passed the visual inspection. Yet, it’s dull. That gray film makes the metal look tired, aged, even dirty. You’ve probably bought the expensive stainless steel cleaners. They sit in your cabinet. Too pricey. Too perfumed. Disappointing.
There is a better way. It costs zero euros. It takes minutes. Pros use this trick but rarely talk about it. You don’t need new sponges. You don’t need to scrub until your arms ache. The secret is in your pantry. One simple preparation. One common ingredient. The result? A sharp shine. A mirror-like surface. Your sink looks brand new again.
Why Your Stainless Steel Sink Looks Dull
That matte gray veil isn’t a mystery. It’s a mix of three things. First, hard water stains. That’s limescale. Second, microscopic scratches from daily use. Third, an invisible film of grease. Even after washing with dish soap, stainless steel holds onto fine residues. Cooking oils. Soap scum. Hard water deposits. These don’t just sit there. They scatter light. Your brain interprets that scattering as dirt. But the sink is actually clean.
Standard cleaning fails here. It removes the visible grime. It leaves the film behind. The dullness remains.
Stainless steel is tough but sensitive. It resists corrosion well. It shows scratches easily. Bad habits make it worse. Abrasive powders. Scrubby sponges. Rubbing against the grain of the steel. You create more micro-scratches. Those scratches trap more limescale and grease. Before you try any miracle method, accept one non-negotiable rule. The surface must be bone dry. If it’s wet, your polish turns into paste. The effect vanishes.
The Zero-Euro Polish Trick: Using Flour
Start with a normal clean. Use dish soap. Use a soft sponge. Wash the entire basin. The edges. The drain. Rinse thoroughly with clear water. Now, the drying step matters. Use a clean towel or a microfiber cloth. Dry it completely. Focus on the corners. Focus around the drain. You need to remove all water. Water dilutes. Water sticks. Water traps residue.
Touch the steel. It should feel dry. Look at it. No droplets. The stage is set.
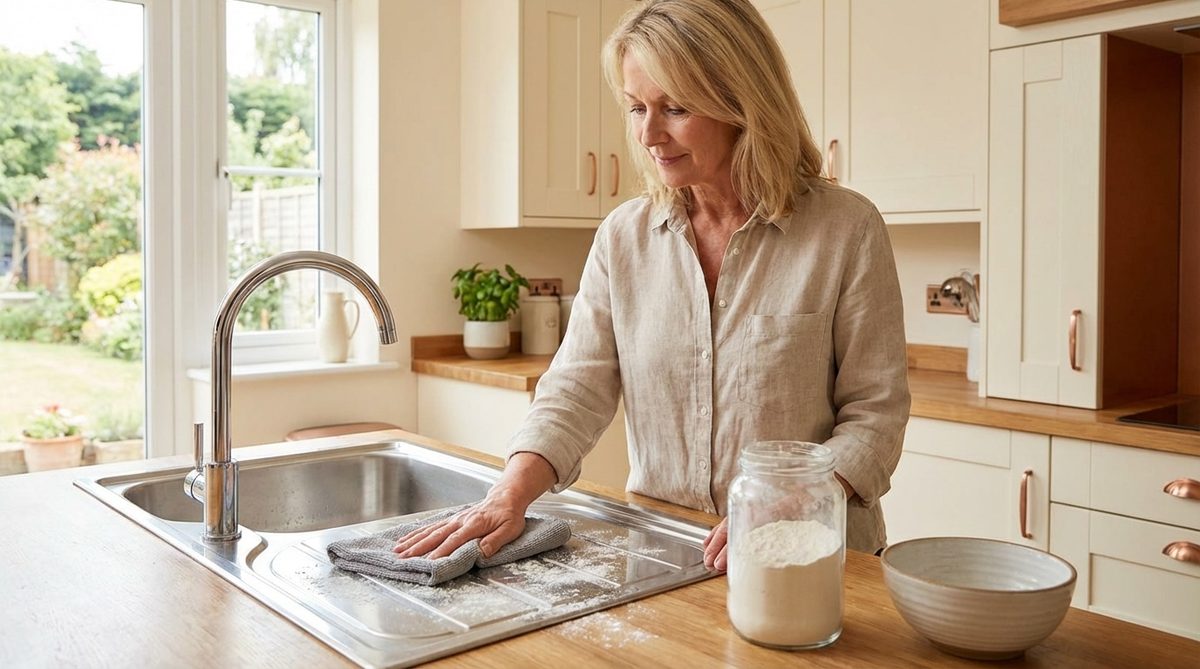
Here is the surprise. Take regular wheat flour. Ideally, T45 flour. It’s fine. It’s consistent. Use a modest amount. One or two tablespoons for the whole basin. Don’t add more. Effectiveness comes from fineness, not thickness. The flour must stay dry. It should feel like a finishing powder. If it clumps, your surface was too wet. Or you used too much flour.
The pro technique is surprisingly simple. Sprinkle the flour over the dry basin. Take a dry microfiber cloth. Rub in circular motions. Do this for two to three minutes. Be consistent. Don’t press hard. You aren’t scrubbing. You’re polishing. The microfiber catches the flour. It works the flour into the metal. The steel starts reflecting light differently. Once you’ve covered the basin, do a final dry wipe. Remove the excess flour. The shine appears.
Mirror Shine Without Scratches: Why It Works
Flour works because it acts as an ultra-fine abrasive. It polishes mechanically. It doesn’t attack the steel if the surface is dry and the cloth is right. Standard flour has very low grit. It smooths out optical irregularities. These tiny bumps cause that dull look. You aren’t removing deep scratches. You’re improving the overall luster by working the micro-surface. That cleaner look creates the “like new” illusion.
There’s another benefit. Flour acts like a grease sponge. It picks up invisible residues. Water and soap often leave these behind. Especially around the drain. Especially in frequently touched areas. Remove those traces. Light reflects better. The metal looks brighter immediately. It’s the same principle as a finishing wax. You remove what you can’t see. But it changes everything.
Avoid these common mistakes. They ruin the result. First, working on wet steel. It turns flour into sticky paste. Hard to remove. Second, using too much flour. It saturates the microfiber. It leaves deposits in the corners. Third, using a damp cloth. Or one soaked in product. It cancels the polishing effect. It spreads instead of capturing. Keep it simple. Dry flour. Dry steel. Dry microfiber.
The shine lasts longer if you dry the sink after every use. Wipe it down. Stop water spots from forming. It’s a small habit. Big difference. You have the method. You have the ingredient. The rest is just action.
Keeping a stainless steel sink looking brand-new isn’t about aggressive scrubbing. It’s about consistency. The sweet spot for deep cleaning is roughly once a week. That’s all it takes to stop that dull, hazy film from setting in. You get a high-gloss finish without the elbow grease.
Between those weekly sessions, daily habits do the heavy lifting. Rinse the basin immediately after washing dishes. Wipe it down. If you let water droplets dry, they leave behind calcium deposits. Soap scum sticks just as fast. This tiny, two-step routine seems trivial. But it drastically reduces the gray veil that returns overnight. It also stops you from feeling the urge to scour the surface hard. Scrubbing too vigorously actually scratches the metal. It marks the finish you’re trying to protect.
The Weekly Stainless Steel Polish Routine
Here is a straightforward checklist. If you follow these steps precisely, you’ll see a mirror-like shine after the first attempt. The goal is a sharp, reflective surface using zero harsh chemicals.
- Basic Prep: Warm water, mild dish soap, and a thorough rinse to remove all soap residue.
- Dry Thoroughly: This is non-negotiable. The stainless steel must be completely dry. No water spots. Pay special attention to the corners and the drain rim.
- Apply the Polish: Sprinkle one or two tablespoons of all-purpose wheat flour (T45) onto the dry basin.
- Buff in Circles: Use a clean, dry microfiber cloth. Rub the flour into the metal using circular motions for two to three minutes. The flour acts as a gentle abrasive.
- Final Wipe: Remove all flour dust with a fresh, dry cloth.
This protocol restores a crisp shine. It skips expensive stainless steel cleaners. It avoids abrasive pads that degrade the surface over time. The key ingredient is simple pantry wheat flour. It works surprisingly well, but only when the metal is bone dry.
Beyond the Sink: Other Pantry Swaps
The flour trick raises a practical question for the DIY homeowner. What other kitchen staples can replace specialized cleaning products? You don’t need a cabinet full of branded solutions. Simple household items often outperform them.
Consider the versatility of white vinegar for hard water spots. Baking soda works as a gentle abrasive for stuck-on food. Olive oil can condition and protect certain finishes after cleaning. These materials are cheap. They are readily available. They reduce waste.
The next time your sink looks tired, look in your pantry first. Test the flour method. Watch the grain of the steel come back to life. It’s a small shift in routine. But the results last all year.
Which other “cabinet ingredients” have you found useful in your home projects? The list goes on.