Before you touch a valve, check the manual. Every oxyacetylene torch has specific safety protocols, and guessing is how you end up with a flashback or a blown hose. If you are venturing into gas welding for a home renovation project, understanding the precise sequence for turning the system on and off is non-negotiable.
Starting the gas flow safely
The process begins with the acetylene side. You need to turn the acetylene regulator screws out to allow gas through and set the working pressure. Next, open the acetylene cylinder valve slowly. Do not crank it wide open. A third to a half turn is sufficient to release the gas.
Move to the torch head. Open the acetylene needle valve and adjust the regulator to about 5 psi. Once the pressure is set, close that needle valve immediately. This stops the acetylene flow so you can start the oxygen without mixing the gases prematurely.
Now handle the oxygen side. Turn the oxygen regulator screws out to allow flow. Open the oxygen cylinder valve slowly until it is completely open. Open the oxygen needle valve on the torch head and adjust the regulator to your desired working pressure, typically around 5 psi for welding tasks. Close the oxygen needle valve to stop the flow.
Pause. This is your checkpoint. Test every valve and hose for leaks. If you hear hissing, stop.
Lighting the flame
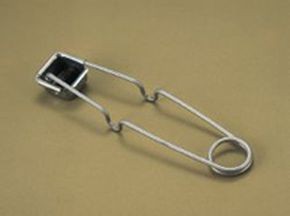
If your torch lacks an internal spark ignition, you need a friction lighter. Hold it about one inch from the tip. Reopen the acetylene needle valve to release the gas and light it.
Watch the flame. You will likely see black smoke at first. Wait for that smoke to disappear. Slowly open the oxygen needle valve. The oxygen ratio determines your flame type. Most welders prefer a neutral flame, which consists of equal parts acetylene and oxygen. Adjust until you achieve that balance.
Shutting down the system
Turning it off is just as important as turning it on. Follow the reverse logic to avoid pressure buildup.
- Close the acetylene needle valve first. This extinguishes the flame.
- Close the oxygen needle valve to cut off the oxygen supply.
- Turn off the acetylene cylinder valve.
- Turn off the oxygen cylinder valve.
You are not done yet. You need to drain the residual pressure.
Open the acetylene needle valve until the gauges read zero. Turn out the pressure adjusting screws on the acetylene regulator. Close the acetylene needle valve. This drains the remaining acetylene from the hoses and torch.
Repeat the process for the oxygen side. Open the oxygen needle valve until the gauges read zero. Turn out the pressure adjusting screws on the oxygen regulator. Close the valve. Now the system is truly off.
Is arc welding a better alternative?
If that sequence feels intimidating, you are not alone. Many homeowners skip gas entirely and go with arc welding. It heats metal through electric discharge rather than combustion.
Why choose one over the other? Arc welding is generally faster and more efficient. It focuses heat more precisely, which reduces the need for extensive preheating or post-heating. You do not have to manage two gas cylinders, regulators, and a complex lighting sequence.
However, gas blowtorches still have their place. They are standard in certain fabrication processes. They are also common in plumbing and other trades where portability is key. If you are working in a field without power, a torch is often the only option.
Gas welding offers portability; arc welding offers precision.
There is no single right answer for every project. If you are stuck in a basement or outside a remote cabin, the torch might be your only tool. If you are working in a shop with reliable electricity, arc welding might save you hours of frustration. Consider the environment, the material thickness, and your skill level before you buy your first torch or arc welder.