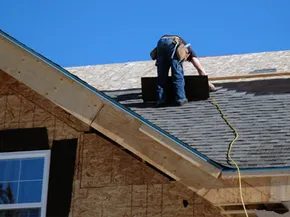
If you find yourself dragging a bucket indoors every time it rains, your roof could be damaged. The time has come to consider purchasing a replacement product. Hiring a professional is safe, but doing the job yourself can save you a lot of money, but at the same time, it can be very difficult.
Installing fiberglass roof shingles is an easy DIY project to master if you follow the right steps. Whether you’re starting from scratch or rebuilding an existing structure, this is right.
Preparation of the roof deck for leveling and ventilation
You cannot build a good roof on a bad foundation. First, make sure your roof deck is level. It doesn’t have to be perfect, but the depth difference between the supports should be within a quarter of an inch. If the roof is uneven, the roof shingles will not be flat, causing leaks and aesthetic problems.
Ventilation is equally important. Modern understanding shows that adequate airflow not only reduces cooling costs. Extend the life of your shingles by controlling excess moisture and keeping your roof deck cool and dry. Before installing shingles, check the attic space and eaves to make sure the vents are clear and properly positioned.
Consider material expansion and contraction
Building materials, such as wood, expand and contract with changes in temperature and humidity. If you press the shingles tightly together, they will bend when the weather changes. Certain gaps must be left.
When installing shingles or underlayment, leave about 1/8 inch (4 mm) of space between them. This small margin gives the material room to react to the elements without deforming. This is a small thing, but it can prevent major structural problems later.
Use felt paper for waterproofing
Protect the exterior with felt paper before installing the shingles. This layer acts as a secondary barrier to water penetration.
- Start at the bottom of the roof.
- Roll the felt along the edges and staple it properly.
- Move up to place the new row directly above the previous row.
- Overlap each row by a few inches.
This layering technique is important. It keeps water out of the seams and adds an important waterproof layer under the visible roofing material.
Install the fiberglass shingless from the bottom up
Each shingle has specific requirements, so be sure to check the manufacturer’s instructions. However, the general installation process for fiberglass roof shingles follows a standard pattern.
Start at the bottom. Place the first sheet so that it extends slightly over the edge of the roof. Staple it down but it stops about 3/4 of the way. Leave the far end loose. This allows the next sheet to slide underneath before the first is fully in place, creating a tight locking seal.
Spread a small amount of wind tab, or roofing cement over each shingle. Sunlight melts this glue and bonds the bottom of the upper shingle to the top of the lower shingle. This thermal activation is the key to wind resistance.
Continue to the roof. When you reach the peak, you may need to use ridge tiles to finish the job. They cover the edges and peaks and seal the highest point of the roof where the weather is the harshest.
Final remarks
If you find this process complicated, it doesn’t hurt to hire a professional. Quality work is important, especially when it comes to protecting your home from the elements. However, if you decide to take on this task, take your time. Measure twice. Staple securely. Respect the gaps.
The sun will do the final binding. Leave enough room for the material to breathe and move. A roof is not just a collection of individual parts, it is a system. Please treat it as such.