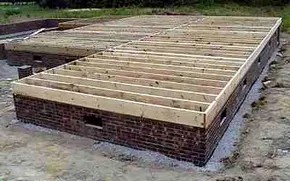
The framing crew shows up next. If you are skipping the slab foundation route, they have a job to do. They build the floor. It is the skeleton of the house.
Here is the reality of floor framing. It starts with a sill plate. You need pressure-treated lumber for this. Why? Because it sits right on the brick of the crawl space wall. Moisture will find it. Regular wood will rot. Treated wood survives.
One interesting detail about this specific build: the house literally sits on the foundation.
There are no bolts. No anchors. It is not held down in any traditional sense. It just rests there. Then they move to the joists. They use 2×10 lumber. They lay it on top of that sill plate.
It is simple. It is heavy. It is the base for everything else.
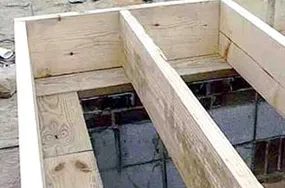

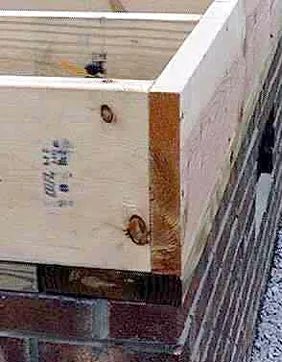

Why brick posts support your center beam
Those brick posts aren’t just decorative columns stuck to the foundation. They do the heavy lifting. They hold up a beam running dead center through the house.
You saw the foundation. You probably spotted them. But do you understand the load path?
The beam itself is solid. Built from three pieces of 2×10 lumber stacked together. That’s 6 inches thick. It takes serious pressure.
The beam is also built from 2×10 lumber (three pieces thick)
Why brick? Why not steel or concrete piers right there?
Cost. Availability. And sometimes, it’s just how the house was built in that era. Brick is durable. It doesn’t rot like wood posts might over decades. It doesn’t rust like steel can if the coating fails.
But here’s the catch.
Brick is brittle. It handles compression well. It hates tension. If the house settles unevenly, that brick post could crack. One crack isn’t the end of the world. A spiral fracture? That’s a problem.
Check the mortar between the bricks. Is it crumbling? If you can poke it out with a screwdriver, you’ve got a repair job before you even think about the beam.
The beam rests on these posts. If the posts fail, the beam drops. If the beam drops, the floor joists sag. The ceiling above cracks. You’re looking at a cascade of damage.
So how do you check if these brick posts are still holding strong?
Look for horizontal cracks. Vertical cracks are usually just settling. Horizontal means the wall is bending. That’s bad.
Tap the bricks. A hollow sound? The brick might be delaminating. Solid thud? Good.
Don’t ignore the base. Is the bottom course of brick sitting on dirt? It should be on concrete. Moisture wicks up from soil. It ruins brick faster than you’d think.
You might be planning to add a second floor. Or maybe you’re just worried about that dip in the hallway. Either way, these posts are the unsung heroes. Or the ticking time bomb.
Inspect them. Really inspect them. Not just a glance while you’re dusting. Get down on your knees. Look at the mortar joints. Look at the wood beam above. Is it splitting where it meets the brick?
If it is, you need a shim. Or a new post. Or an engineer.
DIYers love a good brick repair. Tuckpointing is satisfying. But replacing a load-bearing post? That requires temporary support. Jacks. Shoring. It’s not a Saturday afternoon project.
Know what you’re dealing with. The brick posts are the spine of that central beam. Treat them with respect.
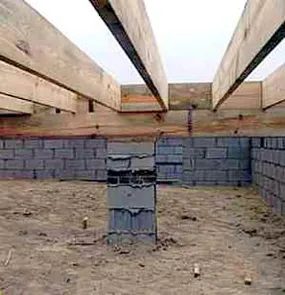

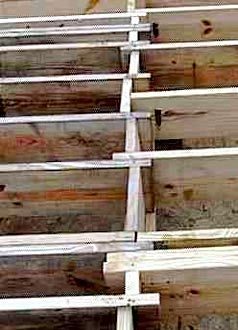

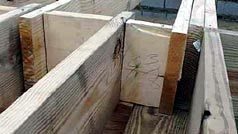

Why your floor joists need a center beam
Look at the floor framing. The 2x10s are called joists. They all terminate at that central beam. It’s not a suggestion. It’s structural necessity.
Some houses build this joint with actual precision. Clean cuts. Tight fit-ups. Yours? Maybe not so much. It looks a bit like a free-for-all where the lumber just happened to collide. That’s okay. It holds up. But it’s messy.
In many houses the meeting of the joists is somewhat better organized!
Don’t let the mess fool you. The load transfer is happening right there. The beam takes the weight. The joists distribute it. Simple physics.
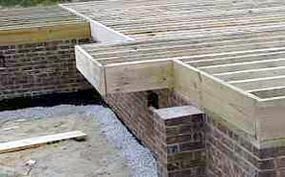
Framing the cantilever for a fireplace
Now look closer at that odd little protrusion. The frame sticks out past the main perimeter. It’s a cantilevered section. Short. Stubborn.
It’s there for one reason. The fireplace.
This isn’t just floor space. It’s a platform. The fireplace sits here, extending outward from the main room. The framing has to support the masonry or metal unit without sagging into the living area below. If this section flexes, the fireplace cracks. If it sinks, the hearth tilts.
You’re building a shelf for heavy stone or metal. Treat it like one. Check the bearing points. Make sure the ledger is solid. This tiny piece of framing carries a disproportionate amount of weight.


Install the Subfloor Sheathing
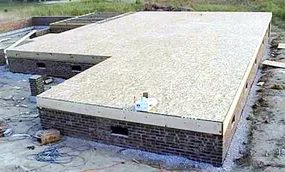
The framing is done. Now you cover it.
Take your plywood or OSB (oriented strand board). You need either 1/2-inch or 5/8-inch thickness. Most pros grab the 5/8-inch stuff. It’s stiffer. Less bounce. But 1/2-inch works if your joists are close together. Check your local code. They might demand thicker stuff for certain spans. Don’t guess.
Lay the sheets perpendicular to the joists. This matters. It ties the frame together laterally. You want that rigidity. Start with a full sheet in a corner. Leave a 1/8-inch gap between sheets and around the perimeter. Wood expands. It shrinks. It moves. If you butt them tight, they’ll cup. You’ll hear them squeak. Then you’ll hate yourself.
OSB is cheaper. It’s more common now. Plywood is better at handling moisture if things go wrong. It’s also smoother underfoot. Pick your poison.
Fasten it down. Use coarse-thread wood screws or ring-shank nails. Screws hold better. They don’t back out as easily. Drive them into the joists. Space them about 6 inches apart on the edges and 10 inches in the field. Follow the manufacturer’s chart. It’s on the side of the bundle.
Don’t skip the fasteners. A loose subfloor is a ticking time bomb for your finished flooring.
Flip to the next sheet. Stagger your joints. Don’t line up the ends over the same joist. That creates a weak line. Spread the load.
Tape the seams if you’re installing vinyl plank or sheet flooring later. It stops moisture wicking up into the wood. For carpet? You can skip the tape.
Walk on it. Listen. Any creaks? Tighten screws. Fill gaps with wood filler if you’re doing a tight finish. Otherwise, let it sit.
The subfloor is in. The skeleton has skin. Now you deal with walls. Or doors. Or whatever nightmare you signed up for next.