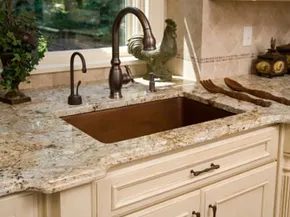
Granite is tough. It is practically indestructible if you let it be. Formed under immense pressure over millions of years, this stone doesn’t blister when you set a hot pot down. It won’t scratch easily. It certainly won’t chip unless you really try. Compare that to marble, which stains and etches with a drop of lemon juice, or laminate, which warps under heat. Granite looks better too. Polish it up and you get this deep, dimensional glow that synthetic materials just can’t fake.
The stuff itself is a mix of minerals. You have feldspar, which gives it those pink, gray, or red hues. Quartz shows up as light gray veins. Mica adds the black speckles. Every slab is unique because of that mix.
Getting it to your kitchen involves heavy machinery. Quarries drill, chisel, and blast massive blocks out of the earth. Special mills cut these into slabs. We are talking 4 to 5 feet wide and up to 9 feet long. Machines then grind them to a uniform thickness, usually between 3/4 inch and 1 1/4 inches.
You can buy precut edges for a standard layout. But if your kitchen has weird angles or specific appliance placements, you might need a custom job. The seams will dictate a lot of that decision. If you are set on granite, the next step is figuring out how to cut it without ruining your back—or your blade.
How to Cut Granite Countertops Safely
Most of the heavy cutting happens at the factory. But you will likely need to trim pieces to fit on-site. You cannot use a standard blade. You need a diamond cutting blade. These are available at big-box stores, but do not skimp on quality. A cheap blade will chip the stone and leave you with jagged edges that look amateurish.
Professionals use collars. Think of them as giant washers on either side of the blade. They reduce vibration. Less vibration means a cleaner cut. If you are dry cutting, prepare for dust. A lot of it. Use a vacuum attachment if you can. It saves your lungs and your cleanup time.
Need to cut a curve for a sink? You need a contour diamond blade. A straight blade won’t make the turn.
Shaping the edges is where things get tricky. You can go for flat, beveled, curved, or rounded. Matching corners perfectly by hand is nearly impossible unless you have an automated edge-shaping machine. Those things cost a fortune. If you don’t have one, your best bet is hiring a local stone fabricator to do the edging. They charge by the square foot. It includes cutting, profiling, and polishing. You pay for precision.
Sink cutouts are another pain point. Getting them exactly right for undermount sinks is difficult. And don’t forget delivery. Granite is heavy. You need two people minimum. Maybe three.
The Cost of Granite
It is not cheap. The material runs $40 to $100 per square foot depending on the rarity and type. Labor adds another $35 to $85 an hour. For an average kitchen, expect to pay between $1,900 and $3,300 in 2023. That is a significant investment. You want to get the installation right the first time.
Installing Granite Countertops
Whether you are hiring someone or doing it yourself, this is labor-intensive. Meticulous measuring is non-negotiable.
Start by clearing the kitchen. Pull out the stove. Move the fridge. Remove the old sink. If the old top was screwed down, empty the cabinets. Pull out drawers and doors. Pry off the old surface. Tape cardboard or paper over the cabinet fronts to protect them from scratches and debris.
Measure everything twice. Note appliance openings. These usually need flush edges. Use templates for sink and cooktop cuts. Don’t forget the backsplash height. If you mess up the space between the sink and the backsplash, your faucet might not fit.
Place a vapor barrier. Plastic sheeting or vulcanized rubber goes between the subcounter and the granite. This prevents moisture damage from underneath.
Since slabs are rarely over 10 feet long, you will have seams. Place them where the cabinetry provides strong support. If the thickness of two pieces varies slightly, use shims to keep them flush.
Join the slabs with silicone. This allows for expansion and contraction. Then use a special epoxy to hold it in place. Mix the epoxy with colored resin to match the granite. You do not want a visible white line between your slabs. Use colored caulk for the backsplash seam too.
How Much Does Granite Weigh?
Gravity is the enemy here. A thin slab weighs about 12 pounds per square foot. A thick one weighs 18 pounds. Take a 10-foot slab, 3 centimeters thick and 2 feet wide. That is 360 pounds.
Lifting that onto cabinets requires planning. Your floor joists need to handle the load. Your arms need to be strong. If you are DIYing this, you are not just building a counter. You are moving a mountain.
The maintenance is easy. The installation is a battle. And if you cut wrong, you start from scratch.
Resealing Granite: The Water Test
Most granite doesn’t strictly need a seal. It’s stone. It’s hard. But it is also porous. Leave it bare and dark liquids soak in. Grape juice. Red wine. Cooking oil. Even grease from the bottom of a pizza box can migrate through cardboard and stain the surface below. A sealer fills those microscopic pores. It forces liquids to bead up instead of absorbing.
Do it before the appliances go in. You need to get to the edges, the corners, the spots around the faucet and sink. Once a stove or dishwasher is bolted down, you can’t reach the gaps. Seepage happens there.
How often? Usually once a year. But granite varies. Some slabs are denser than others. Some areas get splashed more than others.
Here is how you check: dribble water on the counter. Let it sit for ten minutes. Wipe it dry. If the spot is dry and looks the same, you’re good. If it turned dark or wet-looking, the stone drank it up. Time to reseal.
The process is simple but requires patience. You need a granite-specific sealer (look for oil and water stain resistance), a dedicated granite cleaner, and clean rags. Start clean. Scrub the surface. Let it dry completely. If you trap moisture or soap residue under the sealer, it will cloud or peel.
Apply the sealer in small sections. Work it in. Let it penetrate for the time listed on the bottle—usually five to ten minutes. If the stone is thirsty, it might need a second coat. Wipe off the excess. Don’t let it haze over. Then move to the next patch.
Let it cure. Several hours. Ideally, leave it overnight before putting hot pans back on it or splashing water. Some solvent-based sealers last longer, but annual maintenance keeps the stone looking bright and protected.
The Durability Question: Will It Outlast My House?
Granite is tough. It is formed under immense heat and pressure deep underground. It can take the heat of a hot pan dropped directly onto it. It is naturally resistant to bacteria. It is sanitary.
It is also so durable it can outlast the building it sits in. Think about headstones. What is the most popular material for something meant to last forever? Granite.
But permanence is a double-edged sword.
The Reality of Granite Installation
Granite adds value to your home. It doesn’t depreciate. It has a luminous, one-of-a-kind look. No two slabs are identical. If you want perfect uniformity, granite is the wrong choice. You will see veins, specks, and color variations. Some love it. Some hate it.
The cost is steep. The material itself is expensive. The labor is worse. Installation is labor-intensive. You can pay three times more for the install than the stone itself.
Why? Because granite is heavy. Really heavy. It often requires additional structural support for spans and cantilevers. Cabinets must be reinforced. If they aren’t, the stone can crack under its own weight or from impact. A meat cleaver dropped from a height can chip or crack the surface.
And if you change your mind? Good luck removing it. Once it is glued to the cabinets, it stays there. Prying it off usually damages the cabinets below. You are committed.
So, you have the pros. It lasts forever. You have the cons. You can’t change the color. You can’t easily remove it. You pay a premium for the labor. And if you seal a stain in by accident, the stain is permanent.
It is a significant investment. A permanent one. Make sure you like the stone before it is on your counters.